Friday, December 25, 2009

How I made my Gypsy Stylus Charms...

Hi Everyone,
I've been getting requests to show how I made the Charm for my Gypsy Stylus.

This is my first ever beading project so I have no idea of the technical terms... I'll do my best to explain...

You will need:
Pre-made lanyard string (I found a pack of 10 at a bead store or at a hobby store in the bead section)
a piece of wire with a looped end (I bought them like this but you could make one)
a jump ring (circle of wire that's not closed)
selection of pretty beads
and a pretty charm!
You will also need:
Round nose pliers and flat end pliers, if one of these doesn't have a wire cutter, you'll need a cutter too!

Thread your beads onto the wire up to the loop.
Then you'll need to cut the excess wire to leave just the width of your pinkie finger.

Use the round nose pliers to loop the other end of the wire and then bend it back on itself.
Attach your charm to the open loop and then close it off... (I'd removed the extra loop on the charm... but it's still in the photo)
Then use the jump ring to connect the lanyard string to the looped wire.
Do this by hooking it through the lanyard first and then loop is easy to add on. Use both pliers to close the ring... the flat end ones to hold it steady and the round ones to close the ring.

Thread the string through the loop of the stylus.
Then thread the charm and beads through the string loop... pull it tight.

All done... now you'll find it easier to pull the stylus out of the Gypsy and it'll look fantastic too!!!

Thanks for looking & happy crafting!

Sharon

Monday, December 21, 2009

My first Easel Card

Dad asked me to make a card for his Barista...
I like to try a new technique when I make a 'one off' card.... I love looking at all the easel cards on blogs, Cricut messageboards and SplitCoastStampers.

I used my Gypsy to weld letters from Storybook Cartridge to the mug from Graphically Speaking. Stamped sentiment is made up of words from 'Impression Obsession' sentiments set, stamped on label nestibilities.
The flowers and bling are Kaiser.
Sentiment reads: "Merry Christmas to our wonderful barista"


View from the side:

Because the card is going to be signed by a few people, the base opens up so there is a whole panel to write on... I forgot to photograph it open!

Thanks for Looking & Happy Crafting,

Sharon

Friday, December 18, 2009

Simple Wedding cards

I started these a while ago... and since it was such a nasty hot day I thought I'd go back and finish some projects instead of trying to use my melted brain to create something new!!!

I used the Cuttlebug to emobss the wedding cake from Sizzix Textured Impressions wedding kit, dots are from the dots and flowers kit, and the hearts are done on the Cuttlebug also using the Nestibilities hearts...

The stamped sentiment is from the Impression Obsession Sentiments set.... I love this set as you can mix and match all the words to create a perfect sentiment for any occasion.

Very simple, yet I really like the white embossing on wedding cards with coloured metallic paper.


Thanks for looking & happy crafting!
Sharon

Wednesday, December 16, 2009

Phoebe's class Christmas Gifts 2009

This year Phoebe and I made "Sour Cream Containers" (tutorial can be found HERE)

It was actually much quicker than making cards... took about 3 hours in total to produce 30 of them! We started over a week ago, but the project was put aside to work on the glass etching.

I was able to churn out the tags super fast on my Gypsy using Winter Woodland Cricut Cartridge and Phoebe did the glueing... then she wrote "from Phoebe" on the backs of all the tags. She ticked off the list of her classmates as I wrote the names on the front of the tags...

She also helped fill them with jelly beans and then turned the handle on the crimper to seal the ends. Phoebe helped me sort the little bells and put them on wire rings to hang on the tags... the tags can be pulled out of the hole in the container and hung on the Christmas tree once it's been ripped open and the jelly beans eaten!
Here's a close up...


We had lots of fun doing this project together...
Thanks for looking & happy crafting,
Sharon

Tuesday, December 15, 2009

2009 Teachers gifts... more etched glasses!!!

While I'm on a roll with the glass etching... might as well whip up a few for Phoebe to give to all her teachers tomorrow before they finish the school year... her pre-primary class has an amazing teacher and 3 assistants which help both classes... Phoebe has really blossomed this year and it's all due to the positive and encouraging environment they offer the children each day.


I love this beautiful font on Lyrical letters... it's not a clear photo... the letters spell 'Caterina'... I need to learn the macro setting on my new digital SLR!!! I'm still learning what all the buttons do!!!
Thanks to Tash for letting me link her Lyrical letters cartridge as mine didn't arrive in time... why does the post man take so long to bring me new toys???
I would have liked to put a flourish or flower on each glass, but I used up a whole bottle of etching cream on over 80 glass mugs... I can't wait to try another project one day, I'm keen to do etch a border on a mirror to go in the front foyer...

Thanks for looking & happy crafting!!!

Sharon

2009 Govt House Staff Christmas Gifts... Etched coffee mugs...

When I learnt all about glass etching from the ever enabling ladies on the Cricut messageboards, I offered to do them for this year's staff Christmas gifts for Dad to give out at the Christmas party. It was a mad rush as the party was supposed to be next week, but had to be moved to tomorrow!!! So mum and I have worked tirelessly for 2 days to get them all done and packaged up ready to go...
Here's a photo of the work in progress... I etched a dozen at a time and got the next batch ready while the etching cream worked it's miracle... you can see the black vinyl stencils that have been cut on the Cricut after being designed on the Gypsy... I was able to cut a rectangle around each name so it was quick and easy to transfer them to the glasses. Mum and I had a really good factory line going toward the end!!!
The glass etching cream is available at Scrappy-Go-Lucky in the Cricut accessories section.
I got the vinyl from Skat Katz

Here's a close up of one of the mens glasses... this Cricut font is Don Juan. It's really hard to photograph the etched glass!
Here's a more girly font called Gypsy Font... I love how I was able to weld the letters together on the Gypsy, a feature I'm really enjoying!

Here's mum and I standing in front of nearly 40 finished packages containing 2 etched glasses and an assortment of goodies, chocolates, toffees, biscuits and cuppacino sachets... My Gypsy had to be in the photo as I could never have attempted this without my beautiful Gypsy girl!!!

Here's the bags with their tags attached once the mugs and goodies have been placed inside... each staff member gets 2 mugs, one with their name and also their husband/partner. We used the letters from waste of the vinyl stencils to decorate the bags... I think it looks cool! Sadly we were unable to get Christmas coloured bags, so we went with pink for the female staff, blue for the men, and green for all the garden staff!!
The gift cards were made in a few hours.. I just mass produced a very quick and easy tag using Don Juan font, Very Merry Tags and Winter Woodland. Embossed the front of the white cardstock with a cuttlebug embossing folder, which isn't clear in the photo.
Here's the mess we made in the craft room while we were creating these masterpieces!!!!!!
I had so much fun making these... I hope everyone enjoys using their personalised coffee mug!
Thanks for looking & happy crafting!!

2009 Christmas cards for Phoebe's teachers...

I had a great time playing with my Gypsy to create these... I LOVE that you can squeeze so much onto a 12" mat without any wasted paper.

I used Gypsy Wanderings for the scalloped oval and welded Joy from Hello Kitty Font.... covered it in kindy glitz of course!! I used Winter Woodland for the holly... which is sprayed with Gold Glimmer Mist but it doesn't show in the photo. The berries have dimensional magic on them for a beautiful shiny gloss finish.

The paper is from Kaiser Christmas Carnival collection.


and here's some more...
Thanks for looking & happy crafting!!

Saturday, December 12, 2009

Secret Santa matching Christmas Card - Kaiser

A very quick and easy Christmas card to match the gift... vey plain, if I had more time I would have made it much nicer... but I had to rush to get it express posted ... I had also made Jackie a few charms to hang on her Gypsy stylus... so I attached one to the front of the card by using a tag tree from Very Merry Tags Cricut cartridge. The paper is Kaiser from the 6" Lilac Avenue stack. I love the little tags at the back of the stack... very cute and great if you need a quick and easy card.

Second photo shows the charm a little better... another dragonfly and green bead because her Gypsy sleeve is green. Thanks for looking & happy crafting!!!


Monday, December 7, 2009

Aussie Secret Santa project - Kaiser Recipe Stand

I was lucky to have Jackie Russett drawn out of the hat for me to make a gift for... her favourite colours are Green and Mauve... and she loves dragonflies... she has just purchased a new KitchenAid mixer so I thought a recipe stand would be an appropriate gift!!!


I was very excited that my Gypsy arrived just in time to use it for this project... it arrived on Friday and I was supposed to have the gift in the mail by today to get it to Jackie in time... fingers crossed it arrives by Friday for the online Secret Santa party!!!


I used the Kaiser Recipe stand that I purchased from Mister Turtle... Rebecca has amazing prices below the RRP for all her stock.

The papers are from the Kaiser Q2 Lilac Avenue collection, co-ordinating Bazzill and the bling is also Kaiser from Mister Turtle.

I've used my new Gypsy for the lettering which is from Gypsy Font and the dragonflies are from Gypsy Wanderings.

I had so much fun creating my very first Kaiser Beyond the Page project... it was even more fun doing all the designing on my Gypsy!!!! I'm in LOVE with my G!!!

Thanks for looking & happy crafting!!!

Tuesday, November 24, 2009

Simple Birthday Card for 6 year old Erica

Very quick birthday card... last minute as usual... I'd wanted to make a Hannah Montana card as we got her a HM doll but I 90% of my craft room is still in storage so I didn't have the right papers.
I'm happy with how it turned out but I think it's a little bit too heavy on the left side with embellishments... I'm sure a 6 year old isn't going to notice though!!!

Materials used:
Kaiser Patterned paper, bling and flowers
Bazzill cardstock
Alphalicious Cricut Cartridge for "6"
Storybook Font Cricut Cartridge for "Erica"
Letters and number are foam mounted.

Thanks for looking & happy crafting!!!

Friday, July 31, 2009

Bratz Birthday Card

I made this for DD's friend at school... she's turning 5 and DD picked out her present... Bratz dolls and a Bratz convertible car...
I used Inkscape to convert a Bratz colouring book image and then cut the image in SCAL on my Cricut.
Used SCAL to cut the name in MS Script MT Bold font.
Background silver paper is embossed with Love Language Cuttlebug embossing folder.
Thanks for looking & happy crafting! Sharon

Monday, July 6, 2009

365 Cards Challenge - Day 124 - DIY: Computer Generated

Day 124 Challenge at 365 Cards was to use a computer generated image or sentiment on your card.
I have been needing to make some cards for boys birthdays, which are always my toughest challenge. Finding papers to suit boys cards is hard!
I liked this Cricut Cut of a 4 Wheeler Motorbike, and decided to make a background paper to suit. I've scraplifted this idea from a card in the Cricut Aussie Card Swap who used a stamped sentiment on the background paper.
Cardstock is DCWV from the Latte Stack. I wish I'd cut the Celebrate before I stuck the bike down... it all needs to move a little to the left!!

Thanks for looking! Happy Crafting. Sharon. xxx

365 Cards Challenge - Day 123 - White Space

Hello! I'm a week behind in challenges... school holidays and it has to rain!!!
Day 123 at 365 Cards challenge is to use the sketch and the white space must remain white.
Unfortunately my stamped image crept onto the white space... but I had fun anyway!
Stampabilities House Mouse Stamp "Mice-Tro" HMD1013
Cuttlebug Embossing folder "Allegro"
Unknown patterned paper and I hand wrote my sentiment.

Not quite how I wanted it to turn out... but the sentiment fits the paper and stamp, so that's a start! At least I finally made a card!!!

Happy Crafting! Sharon. xxx

Tuesday, June 30, 2009

365 Cards Challenge - Day 122 - It's a Wrap

Today's challenge at 365 Cards is to use gift wrapping paper on a card...
I've used this gift wrap before for a similar card, this was a good excuse to get it out again...

Yummy Gift Wrap from the $1 rack at corner store!
Stamp is Inkadinkado 97648 'Bad or Fattening'
Nestibilities for the squares and scallop squares.
I have been using gift wrap on cards for years.... a cheap alternative!! The next 2 photos show some Christmas cards I've made in BULK... I made hundreds of the first one... and I gave up on the second one because I couldn't figure out how to embellish!
The red/green/white one just used the Cricut to cut the circles with 'George' and 'Alphalicious' for the scallop. Cuttlebug embossing folder for the tree. (which I call the 'Cheese Tree'!!)
The next cards were done using Cricut 'Beyond Birthdays' cartridge... using both the negative and positive cuts to save paper! 
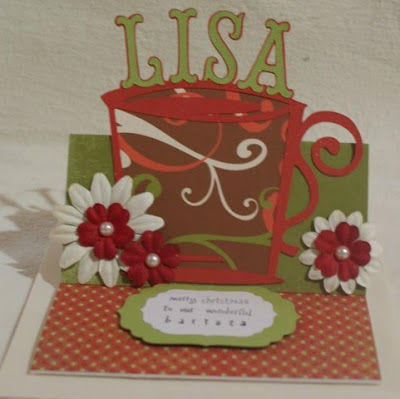
Christmas cards are my favourite cards to make!!

Monday, June 29, 2009

365 Cards Challenge - Day 121 - Four Seasons

This was fun… today’s challenge at 365 Cards is to make a card that incorporates all 4 seasons.
It's winter here in Australia and very stormy today... I'm struggling with the cold as I'm a summer person!
Great day to be inside making cards!!!

I used Cricut Cartridge “Pooh and Friends” for the seasonal squares (icon mode at 1.5”).
Nestibilities for the scalloped squares.
Stampin Up Scallop Edge Punch.
Microsoft Word for the sentiment ‘rage italic’ font.
Summer and Spring Squares are foam mounted.
Cardstock is Bazzill.
It didn't photograph well... The sentiment is "Thinking of you... Through every Season..."

Sunday, June 28, 2009

365 Cards Challenge - Day 120 - Super Sketchy Sunday

Today is Super Sketchy Sunday at 365 Cards Challenge Blog.

When I first saw this sketch I thought 'No Way' I couldn't think of a way to pull it off... but I was determined to give it a go, even if I had to alter the sketch a little... so I made the kids dinner and this came into my head!
I always try to make Australian themed Christmas cards each year... so I decided that the triangles would be trees and the circular shape would be Earth as I make lots of cards to send overseas...

The Trees are cut from Cricut Cartridge "Joys of the Season" at 2.8".
The paper is just a pack from the 2 buck shop. I do like the diamond pattern in the red paper, I think it suits the sketch.
I used Microsoft Word to do the sentiments.
Nestibilities to cut the circles and scalloped circle.

It probably does need something in the corners... but I'll have another look tomorrow with fresh eyes.

It's now past midnight here, so I'm uploading this and going to bed.
Happy Crafting!!!

Saturday, June 27, 2009

365 Cards Challenge - Day 119 - Seeing a Silhouette

The Challenge at 365 Cards is to create a silhouette of an image to use on a card...
Patterned paper is Creative Memories
Stamp is Hero Arts F577 Long Bear Border (old stamp from 1994!!!)
I'm never cutting around a stamped image again.... that's what I have a die cut machine for... I just about went blind trying to see the image I'd stamped on black cardstock with black ink!!!
I couldn't decide which sentiment to use or where to put it... so I left it off...


Friday, June 26, 2009

365 Cards Challenge - Day 118 - I've been framed!

The challenge at 365 cards is to make a frame on your card... Here's my card...
The frame is from Cricut Cartridge "Pooh & Friends"
Stamp: Artee Stamps - SP124G - Md Honeymoners
Cuttlebug Embossing folders "D'Vine Swirls" and "Swiss Dots"

SCAL Transformers Birthday Card

I really struggle to make boys cards, and was so excited to see this free file on Mardenz BLOG.
I can't wait to play with more of her amazing cuts. She does such great work with SCAL.
The photo is dark, the silver background paper was too reflective to use the flash!
Cricut "Mickey Font" Cartridge for Number and Letters. SCAL for Transformer cut.
Cuttlebug embossing folder "Traffic Jam" for the background, inked with black Versa Magic chalk ink.

Saturday, June 20, 2009

Changita Ballerina Card

My daughter was excited when I received this stamp in the post... she is 5 and has just started Ballet at my cousin's ballet company.


Stampendous Changita Ballerina CRV176
Nestibilities Hearts dies
Fiskars Threading Water punch

And here's Phoebe's card for her teacher, I'd be in trouble if I didn't show a photo of her card!
and the inside...

Friday, June 12, 2009

New blog... now I just need inspiration to create!!

Thanks for visiting my new blog... a bit scary to finally get around to setting this up...
Now I have to get busy creating and sharing some cards.
Thanks Fi at http://mycraftyspot.blogspot.com/ for encouraging me and guiding me through this via email.
Now I have lots of tricks to learn to get my blog looking pretty!!
Happy Crafting!!